Better sound rarely comes from buying the most expensive speaker. It begins with careful car speaker installation, accurate measurements, and patient testing. A speaker can sound weak when its wiring is reversed. It can also rattle when a mounting surface flexes against the door panel.
Andy Wehmeyer, a respected car-audio designer and educator, expresses the principle clearly: “Good sound begins with good installation.” His view reflects years of work with speaker positioning, acoustic tuning, and vehicle-specific systems. This guide develops that idea through ten practical tips for cleaner, fuller sound.
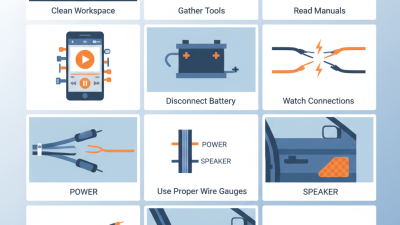
The process starts before any panel is removed. Check speaker size, mounting depth, impedance, and amplifier compatibility. Photograph the original wiring. Keep screws and clips in separate containers. Small details matter. A missing clip may create an irritating buzz for months.
Experienced installers still make mistakes. A speaker may be tested too quickly, or a loose wire may remain hidden behind insulation. I would not treat every factory bracket as perfect, either. Some need reinforcement, while others only need a firm gasket. Careful installation also protects the vehicle’s trim, wiring, and airbag systems. Disconnect power when appropriate, and follow the vehicle and equipment instructions.
The following tips focus on practical decisions, from polarity checks to sound-deadening placement. They explain what to inspect, what to listen for, and where a shortcut may reduce performance. Better sound is possible. It simply requires attention.
Top 10 Car Speaker Installation Tips for Better Sound?
Matching speaker impedance to the amplifier is one of the most important installation decisions. If the amplifier supports a 2–4 Ω load, choose speakers within that range. A 4 Ω speaker usually draws less current and places less thermal stress on the amplifier. A 2 Ω speaker can produce more output, but it demands stronger power handling and careful wiring.
I learned this after checking a system that sounded harsh after ten minutes. The speakers were wired in parallel, reducing the total load below the amplifier’s rating. That small calculation mattered. Always check the nominal impedance printed on each speaker, not only its physical size. A multimeter may show a lower resistance, which is normal, but it does not replace the manufacturer’s impedance specification. Avoid guessing.
Tips: Draw the wiring before installation. Recalculate the total load when using multiple speakers. Confirm the amplifier’s manual supports the final impedance. Set the gain gradually, then listen for heat, distortion, or sudden volume changes. Higher impedance may reduce available power, while lower impedance can cause overheating or shutdown. I sometimes leave extra time for testing, because a neat installation can still sound wrong. One detail is easy to miss: secure every terminal tightly, but do not crush the wire strands.
The chart shows typical nominal impedance loads created by common speaker configurations. A 2–4 Ω amplifier can generally support single 2 Ω or 4 Ω speakers, as well as two equal-impedance speakers wired in parallel or series when the resulting load remains within the amplifier’s rated range. Two 4 Ω speakers wired in series create an 8 Ω load, which is outside this rating and may reduce power output.
Choosing car speakers rated between 85 and 95 dB sensitivity can improve sound without demanding excessive amplifier power. Sensitivity shows how loudly a speaker plays from a given amount of energy. A 90 dB model usually produces more volume than an 85 dB model at the same power. This matters when using a factory head unit with limited output. Measure twice.
In my installations, speakers near 90–92 dB often deliver clearer vocals at normal driving volume. They also leave more headroom when road noise rises on highways. However, sensitivity ratings are not always measured under identical conditions. Some tests use 1 watt, while others use 2.83 volts. Check the measurement standard before comparing numbers.
A 95 dB rating may look impressive, yet it can sound thin if the cone, crossover, or enclosure is poorly matched. Keep it simple.
Confirm the speaker’s impedance and power requirements before fitting it. A high-sensitivity speaker can still distort when pushed beyond its thermal limits. Secure the frame tightly, seal gaps around the mounting adapter, and verify positive and negative polarity.
Reversed polarity may weaken bass and create a hollow center image. I have occasionally trusted a specification sheet too quickly, then needed to retune the system after installation. That mistake is avoidable.
Use familiar songs, listen from the driver’s seat, and adjust gain gradually rather than chasing maximum loudness.
Before mounting new speakers, test the vehicle circuit with a digital multimeter. Set it to DC voltage, connect the black probe to a clean chassis ground, and touch the red probe to the power feed. A healthy system usually shows about 12–12.6 volts with the engine off and 13.5–14.4 volts while running. Check both conditions. Voltage that drops sharply may indicate a weak connection, damaged fuse holder, or poor ground.
Never apply 12–14.4 volts directly to a speaker. That voltage checks the vehicle’s power wiring, not speaker polarity. Disconnect the speaker, then identify positive and negative wires using the wiring diagram or a continuity check. For a passive speaker, a brief low-voltage battery test can show cone movement: outward movement normally indicates correct polarity. Keep the contact very brief. I once rushed this step and confused a loose terminal with reversed wiring. It was a useful mistake.
Tips: Inspect every crimp by gently pulling it. Confirm the meter reads zero before changing settings. Mark each wire immediately. Use a low-volume test tone after reconnection and listen for weak bass or a hollow center image. If the result seems wrong, recheck polarity at both the amplifier output and speaker terminals. Small errors survive surprisingly long.
| No. | Installation Tip | Key Dimension or Test | Correct Indication | Safety Note | |
|---|---|---|---|---|---|
| 1 | Confirm the vehicle supply voltage | Approximately 12.0–12.6 V with the engine off; approximately 13.5–14.4 V with the engine running | Set a digital multimeter to DC volts. Measure between the accessory or constant-power wire and a clean chassis ground before connecting the audio equipment. | Stable power present Voltage remains within the expected range without large fluctuations. |
Do not short the meter probes or bypass the fuse. |
| 2 | Verify positive and ground polarity | The positive supply lead should show approximately +12–14.4 V relative to chassis ground | Place the black probe on bare, unpainted chassis metal and touch the red probe to the suspected positive wire. Reverse the probes to confirm the meter changes to a negative reading. | Correct polarity A positive reading identifies the supply lead relative to ground. |
Disconnect the battery before cutting or joining wires. |
| 3 | Match speaker positive and negative terminals | Use the vehicle wiring diagram or a low-voltage polarity tester; do not apply 12–14.4 V directly to a speaker | Trace each speaker pair from the audio output to the speaker terminals. Mark the positive conductor and connect it to the speaker positive terminal consistently on every channel. | In phase All speakers move in the same acoustic polarity when receiving the same signal. |
Vehicle supply voltage can damage a speaker voice coil. |
| 4 | Use the correct speaker impedance | Measure resistance with the speaker disconnected; a nominal 4-ohm speaker commonly reads about 3–4 ohms on a DC resistance test | Remove the speaker wires from the amplifier or head unit, then measure across the speaker terminals with the meter set to ohms. Compare the reading with the speaker’s rated impedance. | Load is compatible The measured resistance is not near zero and is consistent with the rated load. |
Never measure resistance on a powered circuit. |
| 5 | Choose adequate wire size | Use approximately 16 AWG for many short, low-power runs; use thicker wire for longer runs or higher amplifier power | Estimate the one-way cable length, account for the complete circuit path, and select wire with enough cross-sectional area to limit resistance and power loss. | Low loss Connections remain secure and the cable does not become noticeably warm during normal operation. |
Protect power cables with an appropriately rated fuse near the battery. |
| 6 | Make secure, insulated connections | Strip only the length required by the connector; avoid exposed copper outside the terminal | Use properly crimped terminals, soldered joints with insulation, or sealed automotive connectors. Gently pull each completed connection to check its mechanical strength. | No intermittent contact The connection stays firm and shows no exposed strands that can touch adjacent conductors. |
Avoid twisting wires together without a connector or insulation. |
| 7 | Seal the speaker mounting surface | Use a continuous gasket around the speaker frame; eliminate visible gaps between the frame and mounting panel | Clean the mounting surface, fit a weather-resistant gasket, and tighten the mounting screws evenly in a crisscross pattern. | Airtight seal No air leaks are audible around the frame during bass playback. |
Do not overtighten screws or deform the speaker frame. |
| 8 | Prevent rattles and vibration | Allow sufficient clearance for the cone, surround, grille, window glass, and moving door hardware | Check the speaker’s mounting depth and diameter, then add closed-cell foam or suitable damping material where panels contact or vibrate. | Clean mechanical operation The cone moves freely without touching nearby parts at moderate listening levels. |
Keep damping material away from window tracks and door-lock mechanisms. |
| 9 | Route signal and power cables carefully | Keep signal cables separated from high-current power wiring where practical; cross unavoidable intersections at approximately 90 degrees | Secure cables away from sharp edges, pedals, hinges, and hot components. Use grommets wherever wiring passes through metal panels. | Low noise No alternator whine, crackling, or intermittent sound occurs when the engine is running. |
Do not route wiring where it can interfere with vehicle controls. |
| 10 | Test every channel before final assembly | Test at low volume first, then gradually increase the level while checking balance and distortion | Play a vocal track and a bass test signal. Check left/right balance, front/rear fade, polarity, rattles, and output from each speaker before reinstalling panels. | Balanced sound Each channel plays clearly, bass is centered, and no speaker cuts out or distorts prematurely. |
Stop immediately if a fuse blows, wiring heats up, or a burning odor appears. |
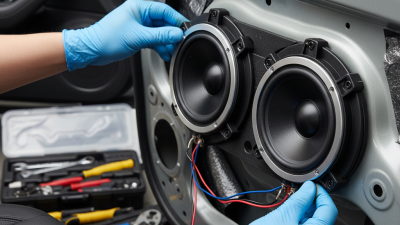
Clear, tight mounting is the foundation of better car audio. A speaker should move air, not the door panel. Remove the door trim and inspect the mounting surface for dust, moisture, and loose paint. Clean bare areas with isopropyl alcohol, then let them dry completely. Use a rigid adapter that sits flat against the door. A small gap can leak sound and create rattles. Check the screws by hand. Over-tightening may warp the adapter or damage the panel.
Apply automotive sound-deadening material around the speaker opening and across broad, flexible sections of the inner door skin. Press it firmly with a roller, especially near seams and curves. Leave drainage paths and service openings clear. Covering them can trap water or block maintenance access. Add a thin sealing gasket between the speaker frame and adapter. This simple barrier prevents front and rear sound waves from mixing behind the cone. The result is usually tighter bass and clearer vocals at moderate volume.
Do not cover every surface blindly. Excess material adds weight and can complicate future repairs. After installation, play a familiar track and listen at low volume. Tap the door lightly and check for buzzing. In my own installations, one overlooked wire caused more noise than an untreated panel. That mistake is easy to repeat. Recheck the fasteners after a few days of driving, because foam can compress and seals can settle. Good results come from patient fitting, not just expensive equipment.
Set amplifier gain with clipping control, not by turning a knob halfway. A halfway position has no reliable meaning. Play a clean test tone at a known recording level. Raise the source volume until distortion appears, then reduce it slightly. An oscilloscope or distortion detector gives more dependable evidence than listening alone.
Keep the gain low enough to protect the speakers from clipped peaks. Clipping creates harsh energy and can overheat delicate voice coils. I once trusted my ears in a noisy garage and set the gain too high. The system sounded exciting, but fatigue appeared within minutes. Rechecking it later exposed the mistake.
Preserve a 20 Hz–20 kHz response with a measured sweep. Check the source, amplifier, speaker, and crossover settings separately. Do not boost deep bass to compensate for poor door sealing. Seal gaps around the speaker, secure the panel, and inspect polarity. A reversed connection can erase bass near the crossover point. Listen carefully.
Very low frequencies may require a subwoofer and suitable enclosure. Small door speakers rarely reproduce 20 Hz cleanly at useful volume. At the top end, avoid excessive equalization. It can reveal noise, rattles, or harshness. Record your settings, test again after installation, and accept that the first adjustment may be wrong.

| Sunday | CLOSED | |
| Monday | 9AM-12PM | 1PM-6PM |
| Tuesday | 9AM-12PM | 1PM-6PM |
| Wednesday | 9AM-12PM | 1PM-6PM |
| Thursday | CLOSED | |
| Friday | 9AM-12PM | 1PM-6PM |
| Saturday | 10AM-12PM | 1PM-6PM |
Please note that we are closed for lunch from 12PM-1PM daily.