What Is a Threaded Insert and How Does It Work?
A threaded insert creates a durable internal thread in material that may be too soft, thin, or easily damaged for repeated screw installation. In wood, plastic, or light metal, the insert provides a stronger, reusable fastening point. Inserts Threaded come in several designs, including press-fit, heat-set, and screw-in types. Choosing one depends on the material, expected load, installation method, and available space.
Fastener engineer John H. Bickford is known for his work on bolted-joint design. A practical lesson consistent with that work, paraphrased rather than presented as a direct quotation, is: “A reliable fastener depends on the joint around it, not just the thread.” That distinction matters. A metal insert installed in a thin plastic panel can still fail if the panel cracks or the hole is oversized. Small details count.
Installation is usually straightforward: prepare a correctly sized hole, fit the insert using its specified method, then engage the screw. The insert’s outer surface grips or bonds with the surrounding material; its inner thread accepts the fastener. No magic. But fit and alignment matter. A crooked insert can make a screw bind, while excessive installation force may damage the workpiece. This guide explains how threaded inserts work, where different designs are useful, and what to check before installation. Real materials vary, so manufacturer instructions and a small test piece are sensible safeguards. One caveat: choosing by appearance alone is tempting—and sometimes wrong.
What a Threaded Insert Is
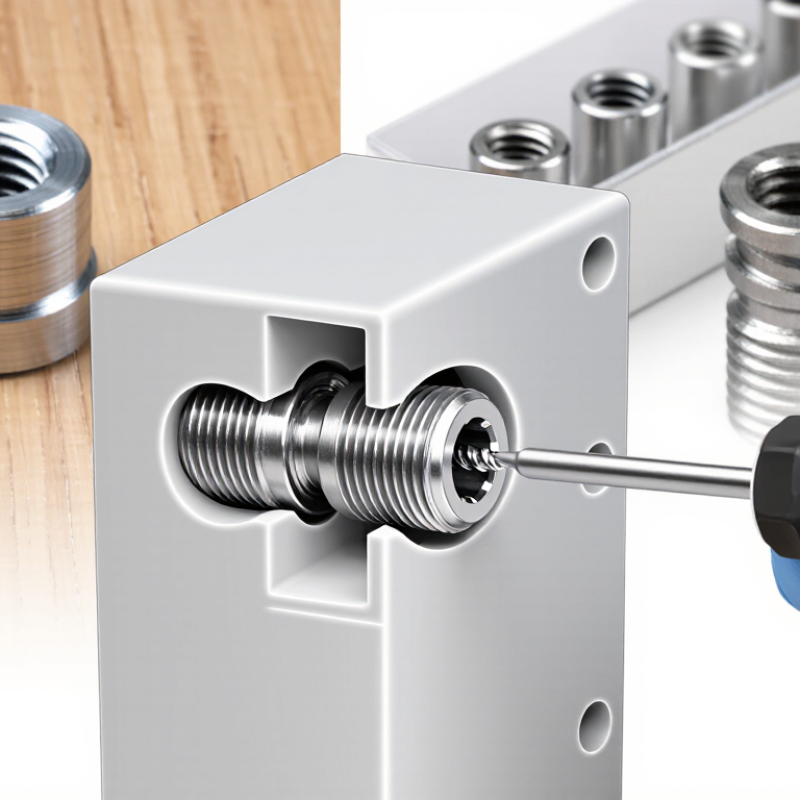
A threaded insert is a small fitting that adds durable internal threads to a material that may not hold a screw reliably on its own. It usually has a hollow center with threads inside and a shaped outer surface. That outer surface may have ridges, grooves, or a coarse thread to help the insert stay in place. Inserts are made in different sizes and materials, and their designs suit different applications.
Once installed in a prepared hole, the insert provides a threaded opening for a bolt or machine screw. The outer shape grips the surrounding material, while the inner threads guide and hold the fastener. This can spread stress across a wider area than a screw driven directly into soft wood or plastic. Installation varies: some inserts are pressed, screwed, or heated into place. The right method depends on the insert and base material. A poor fit can loosen over time. Details matter.
Tips: Check the hole size and material compatibility before installation. Keep the insert straight as you fit it; a slight angle can make fastening awkward. If the material is thin or brittle, test the setup on a spare piece first. Even careful work can have surprises.
Key Parts and Materials of a Threaded Insert
What Is a Threaded Insert and How Does It Work?
Key Parts and Materials of a Threaded Insert
A threaded insert is a sleeve that adds internal threads to a softer or damaged component. Its core parts are the internal thread, outer anchoring feature, and entry end. The internal thread receives a screw or bolt; the exterior transfers load into the surrounding material. Some inserts use knurls, keys, or coarse external threads to resist turning or pullout. Small details matter.
Common materials include carbon steel, stainless steel, brass, and aluminum. Selection depends on the base material, corrosion exposure, temperature, and expected service load. ASTM A240/A240M lists 304 stainless steel plate with minimum tensile strength of 515 MPa and yield strength of 205 MPa. These figures are a material benchmark, not a rating for a finished insert; forming and heat treatment can change performance. NASA’s Fastener Design Manual, RP-1228, also highlights the importance of joint design and load distribution. In practice, matching the insert to the parent material is easy to underestimate.
Tips: Check the insert’s material and installation guidance, then test it in a representative sample. A tight fit can still damage thin or brittle material. I would not assume that a stronger insert always makes a stronger joint.
What Is a Threaded Insert and How Does It Work?
Key Parts and Materials: Representative Material Density
A threaded insert provides internal threads in a host material. Its body carries the internal thread, while features such as knurls or external threads help anchor it in place. Material choice depends on the application; density values below are representative material properties, not insert specifications.
How a Threaded Insert Creates a Strong Thread
A threaded insert creates a strong thread by moving screw loads into a larger area of the surrounding material. Its outside features—such as knurls, coils, or external threads—grip the parent material, while its inner thread gives the screw a durable bearing surface. As the screw tightens, force passes through the insert and spreads into the part. In soft aluminum or plastic, that can help prevent stripped threads after repeated assembly.
The screw and insert still need to be matched. ISO 898-1:2013 specifies a nominal tensile strength of 800 MPa for property-class 8.8 steel fasteners of smaller standard diameters; that figure describes the screw, not the insert or the assembled joint. NASA’s Fastener Design Manual, NASA RP-1228, separately addresses fastener strength and thread shear, underscoring why both need checking.
Fit matters. A hole that is too large may let the insert rotate or pull out, while poor installation can damage the parent material. For a real design, test the assembly in the actual material and thickness.
I would not rely on a generic pull-out value: even a small change in hole size can alter the result.
Common Types of Threaded Inserts
Threaded inserts provide a reusable internal thread in materials that may otherwise strip, crack, or wear. Common types include wire, solid, self-tapping, press-fit, and heat-set inserts. Each suits a different base material and installation method.
Wire inserts are coiled metal sleeves fitted into tapped holes. They can repair damaged threads or reinforce softer metals. Solid inserts offer a rigid threaded wall; some use locking keys to resist turning under vibration. Self-tapping inserts form their own external thread as they enter a prepared hole. That saves a tapping step, but the hole size must be precise. Press-fit inserts rely on knurls or ribs gripping the surrounding material. Heat-set inserts are pushed into thermoplastics with a heated tool, leaving plastic around their ridges. Not interchangeable.
Selection takes more than matching screw diameter. Check substrate, load direction, vibration, wall thickness, and installation access. ISO 68-1 specifies a 60-degree basic profile for ISO metric screw threads, an important compatibility reference when matching internal threads and fasteners. NASA’s Fastener Design Manual, NASA RP-1228, also stresses that thread strength depends on factors such as material and engagement. A longer insert is not automatically safer; thin walls can split. I would verify the maker-neutral installation dimensions against the relevant technical specification, then test a sample in the actual material. It is easy to overlook that last step.
How Threaded Inserts Are Installed and Used
A threaded insert gives a screw a durable internal thread in material that may be too soft, thin, or easily damaged to hold one reliably. Installation depends on the insert style and the workpiece. Check the insert instructions and prepare a hole of the specified size; a hole that is too small can split the material, while an oversized one may not grip.
For a heat-set insert in thermoplastic, place it squarely over the prepared hole and warm it with a suitable controlled tool. Apply gentle, steady pressure as it softens the surrounding plastic. Keep it square. Stop if the insert tilts or sinks too far. For a press-in style, use a press or a steady vise to seat it without crushing the workpiece. Metal inserts may require tapping, adhesive, or a specified installation tool, so avoid assuming one method fits every design.
Let it cool. Once installed, start the screw by hand to check that the threads engage smoothly, then tighten it to the appropriate level rather than forcing it. A loose insert can spin; an over-tightened screw can damage the insert or material. Even careful work can leave an insert slightly off-center, so check alignment before assembling parts that must fit precisely.