
Garden Sun Screen Netting can turn a harsh, exposed patch into a more comfortable growing space. On a hot afternoon, it may reduce direct sun on tender leaves, help limit heat stress, and give seedlings a gentler start. The right choice depends on your garden. A leafy vegetable bed, a greenhouse bench, and a patio tomato plant do not need the same shade.
Horticulturist Dr. Linda Chalker-Scott is known for emphasizing evidence-based plant care. A practical takeaway from her approach is: “Match garden solutions to the conditions plants actually face.” That matters with netting. Before choosing a shade percentage, observe where sunlight falls at midday and late afternoon. Check whether plants look scorched, wilted, or simply dry. Then consider airflow, rain access, and how securely the netting can be fixed. A screen that blocks too much light may slow growth. Too little shade may leave sensitive plants exposed.
Small details count. A loose edge can flap in the wind; a low-hanging panel can press against wet leaves. Garden Sun Screen Netting is not a cure-all, and results vary with climate, crop, and installation. A little trial and observation help. This guide explores how to select suitable netting, install it safely, and maintain a balanced growing environment without guessing at what your plants need.
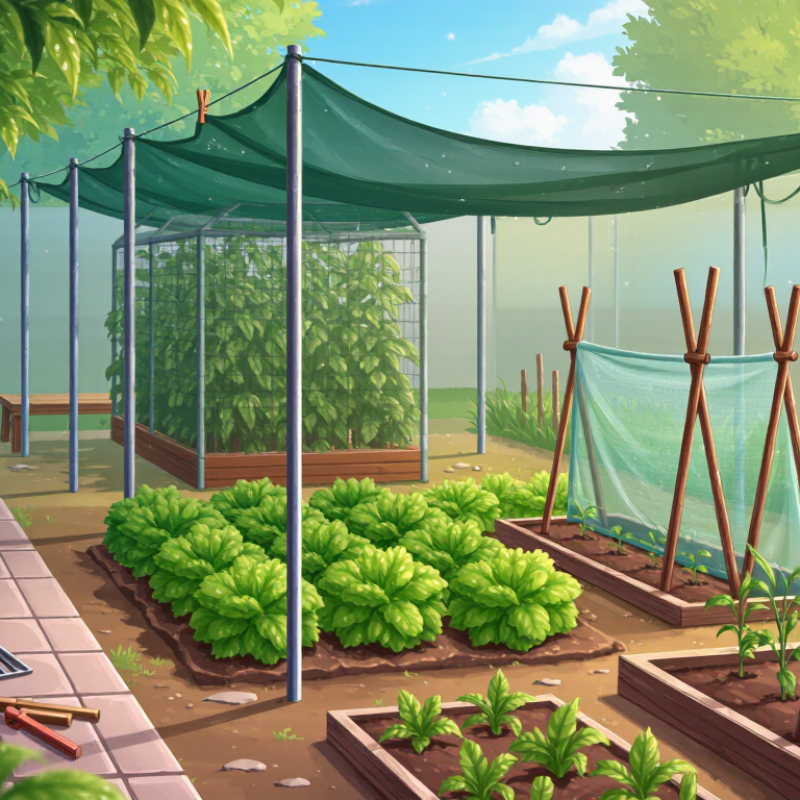
Garden sun screen netting is a lightweight mesh placed above or around garden beds, patios, and young plants. Its openings soften direct sunlight while allowing some air and rain through. Unlike a solid cover, it usually creates dappled shade rather than darkness. The amount of light blocked depends on mesh density, color, and placement, so check product details and observe your garden before covering a whole bed. Try a small area first.
The netting works by intercepting some sunlight before it reaches leaves and soil. This can reduce harsh midday exposure and slow surface drying, but it cannot replace watering or solve every heat problem. It may also reduce wind stress. However, placing it too close to foliage can restrict airflow or trap warm air. Leave space above plants, secure the edges, and check for wilting or pale leaves. Shade needs vary by plant and season.
Tips: Start with one bed and watch how plants respond over several sunny days. Lift or remove the net when conditions change, and check that it does not rub against tender leaves. The right setup can take a little adjustment.

Garden sun screen netting can reduce harsh midday light while still allowing air to move around leaves. This matters for seedlings, leafy greens, and other plants that wilt when exposed to intense sun. Under a net, soil may dry more slowly, so check it before watering rather than following the same schedule every day.
The right shade level depends on the crop, season, and local climate. A light-colored net with moderate shade can help protect tender leaves without making the growing area too dim. Watch for signs: scorched edges may suggest too much sun, while stretched stems or slow flowering can mean the plants need more light. Not every plant agrees. A net that helps lettuce may hinder sun-loving tomatoes.
Leave space between the net and the foliage so warm air can escape, and secure the edges against wind. Check plants at different times of day; a bed that looks comfortable in the morning may still heat up by afternoon. Shade netting is useful, but it is not a set-and-forget fix. Adjust its height or coverage as plants grow, and remove or open it when cloudy weather lasts.
In exposed garden beds, garden sun screen netting can soften intense midday light and reduce leaf scorch on tender seedlings. Leafy greens, young herbs, and newly transplanted plants may benefit during hot spells. Check the crop’s response, since fruiting plants often need more direct light than shade-tolerant greens. Feel the soil beneath the net, too; shade does not replace watering. Too much shade can slow growth. It is easy to cover a bed and forget that light changes through the season.
In dry, sunny gardens, netting may make afternoon conditions less harsh, but its effect depends on mesh density, wind, and placement. In humid areas, leave open sides so air can move and damp leaves can dry. Small balconies can use a simple frame, provided the net stays clear of leaves and does not catch in strong gusts. Secure the edges, then inspect them after windy weather. Netting is not storm protection. A practical approach is to cover only the most exposed plants first and compare their growth with uncovered plants nearby. That small trial can reveal whether the shade is helping or simply reducing useful light.
Choosing the right garden sun-screen netting starts with understanding what your plants need. Leafy greens often benefit from stronger shade during hot afternoons, while tomatoes and peppers usually need more sunlight for healthy growth. Check the netting’s shade rating rather than judging it by color alone. More shade is not always better. Dense mesh can reduce heat, but it may also limit light and airflow. Start with airflow.
Consider your local conditions, too. A windy, exposed bed needs securely reinforced edges, while a sheltered patio may need a lighter setup. Look for durable, UV-resistant material, and check that the mesh allows rainwater to pass through. Measure the bed before buying, including space for clips or supports. A net that barely reaches the frame can pull loose in a gust. Secure it firmly, but leave enough room so it does not press against leaves. Watch plants closely. If stems stretch or leaves look pale, the covering may be blocking too much light. Adjusting the height or coverage can help; the first setup may not be quite right, and that is worth checking.
Choose netting by the plants’ needs, not by the darkest patch it creates. University of Florida IFAS Extension’s greenhouse-shading guidance explains that shade cloth is rated by the percentage of sunlight it blocks; a 30% cloth blocks about 30% of incoming light. Start with a moderate rating for mixed beds, then watch for pale leaves, stretched stems, or scorched edges. These clues are imperfect, but useful. Attach the net above foliage, leaving space for airflow. Secure every corner and check the frame after wind; a sagging net can trap heat and rub leaves.
For installation, use UV-stabilized garden netting and fasten it to a sound frame with clips or ties. Keep the net clear of sharp edges. Do not pull it so tight that seasonal movement tears the fabric. In spring, cover only heat-sensitive seedlings during the brightest hours. In summer, extend coverage when plants show stress, while leaving pollinator access where possible. University extension guidance commonly distinguishes shade levels by blocked light, but the right setting still depends on crop and climate.
Inspect seams, ties, and accumulated debris every few weeks. Wash with mild water when dust reduces light, then dry fully before storage. Remove or roll back the net during cool, cloudy periods; too much shade can weaken growth. The University of Florida IFAS guidance is greenhouse-focused, so its recommendations do not fit every backyard bed exactly. I would treat the percentage as a starting point, not a promise.
| Topic | Practical Guidance | Useful Details | When to Apply |
|---|---|---|---|
| Purpose of shade netting | Reduces direct sunlight and can help limit heat stress, sunscald, and rapid moisture loss. | It does not replace watering, ventilation, or crop-specific care. Results depend on the crop, climate, netting, and installation. | During periods of intense sun or unusually hot weather. |
| Choosing shade density | Select a shade percentage suited to the plants and local conditions; lighter shade is often preferable for sun-loving crops. | Shade percentages describe the proportion of light blocked. Check crop guidance and observe plant response rather than relying on one rate for every garden. | Before installation; adjust if plants show signs of insufficient light or heat stress. |
| Planning the structure | Use a frame, hoops, or other supports strong enough for the netting and expected wind exposure. | Keep the fabric clear of plant leaves where practical, and leave room for air to circulate and for garden access. | Before hot or high-sun periods begin. |
| Installing the netting | Drape the net evenly over the support and secure its edges with clips, ties, or suitable fasteners. | Fasten the net without excessive tension, check that it cannot flap against plants, and avoid blocking access or drainage. | When daytime heat or strong sun starts affecting plants. |
| Monitoring plants | Check leaves, soil moisture, and growth regularly after fitting the net. | Wilting can have several causes. Check soil moisture and airflow as well as light levels before changing the shade setup. | Frequently during the first few days, then as conditions change. |
| Watering under shade | Continue to check soil moisture and water according to the needs of the plants. | Shade may slow water loss, but it does not make a fixed watering schedule reliable for every bed or season. | Throughout the growing season, especially during hot, dry, or windy weather. |
| Wind and weather checks | Inspect fasteners and supports after strong winds, heavy rain, or other severe weather. | Repair loose attachments promptly. Remove or secure the net if conditions exceed what the frame can safely withstand. | After storms and during forecast periods of high winds. |
| Cleaning and care | Remove soil and plant debris using gentle cleaning methods suitable for the net material. | Follow the product care instructions; avoid harsh chemicals or abrasive tools that could damage the fabric. | As needed, and before storing the net. |
| Seasonal removal | Take down or reposition the net when plants need more light or cooler conditions return. | Seasonal timing varies by climate and crop. Inspect plants and local weather rather than using a single calendar date. | At the end of hot weather, or when the growing conditions change. |
| Off-season storage | Allow the net to dry completely, fold it loosely, and store it in a clean, dry place. | Keep it away from sharp objects, pests, and prolonged dampness. Check for tears and worn fasteners before reuse. | After seasonal removal and before the next installation. |

| Sunday | CLOSED | |
| Monday | 9AM-12PM | 1PM-6PM |
| Tuesday | 9AM-12PM | 1PM-6PM |
| Wednesday | 9AM-12PM | 1PM-6PM |
| Thursday | CLOSED | |
| Friday | 9AM-12PM | 1PM-6PM |
| Saturday | 10AM-12PM | 1PM-6PM |
Please note that we are closed for lunch from 12PM-1PM daily.